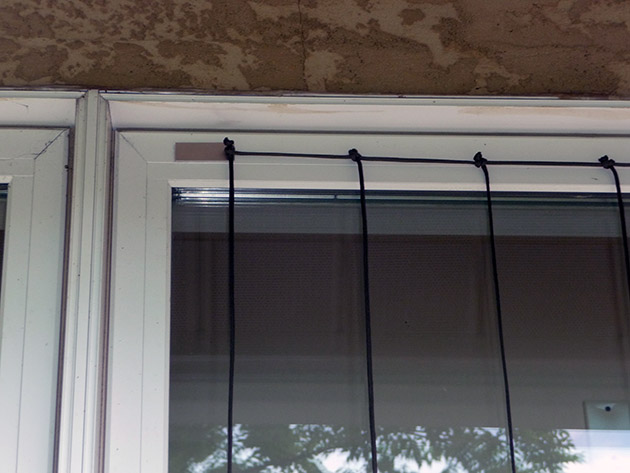
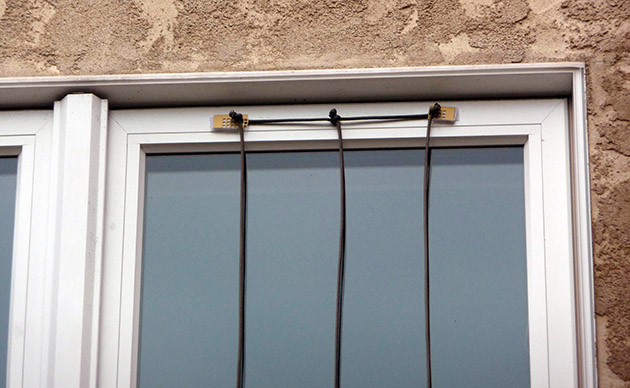
How to make "All Paracord" Acopian BirdSavers; using paracord for the top horizontal piece, as well as for the vertical pieces.
Step 1: Measure the width of the glass.
Then Use these tables to determine how many vertical cords will be needed. For DIY Acopian BirdSavers, we recommend spacing the cords 4 inches apart, but you can read more about cord spacing in the FAQ - How far apart should I space the BirdSavers paracords? If there is more than one pane of glass in your window, you may want to have a look at the “Acopian BirdSavers Cord Spacing Examples” before taking any measurements.
Step 2: Determine the length of paracord pieces you will need.
You have two choices:
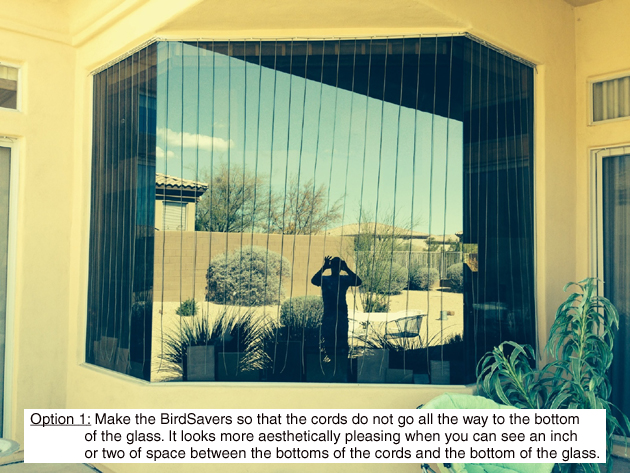
Option #1: the option we prefer (because it looks so cool!), is to make the BirdSavers so that the cords do not go all the way to the bottom of the glass. It looks more aesthetically pleasing when you can see an inch or two of space between the bottoms of the cords and the bottom of the glass, like in the photo below:
Option #2: is to have the cords go all the way to the bottom of the glass and beyond, like in the photos below:
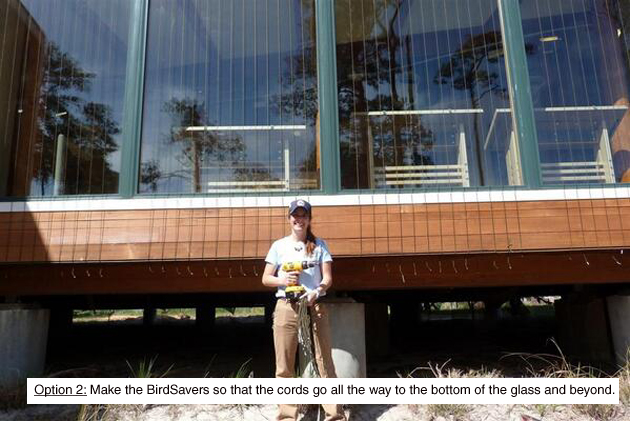
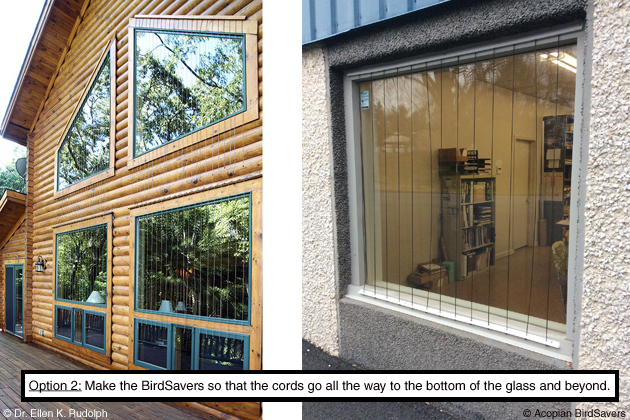
To the birds it makes no difference which option you choose; you will achieve a 90 to 100 percent reduction in bird-window collisions with option #1 or option #2.
If you are making Option #1 BirdSavers:
Determine the length of the vertical paracord pieces you will need, so that when they are hanging they stop about an inch or inch and a half above the bottom of the glass. A knot will be tied at one end of each vertical paracord piece (see BirdSavers Tying Technique video). That knot, which will be at the top of the BirdSavers, will use up about one inch of paracord, so add that one inch to the length of each of the vertical paracord pieces you will need.
3/4/2025: If you use this alternative method that melts the cords together, you can skip tying the knots in Step 4, and skip the BirdSavers Tying Technique in Step 5.
If you are making Option #2 BirdSavers:
Determine the length of the paracord pieces you will need so that they stop wherever you determine you would like them to stop. A knot will be tied at one end of each vertical paracord piece (see BirdSavers Tying Technique video). That knot, which will be at the top of the BirdSavers, will use up about one inch of paracord, so add that one inch to the length of each of the vertical paracord pieces you will need.
3/4/2025: If you use this alternative method that melts the cords together, you can skip tying the knots in Step 4, and skip the BirdSavers Tying Technique in Step 5.
If you decide to attach the cords at the bottom, here are a few methods.
Some people worry about wind tangling the cords, and therefore decide to attach the cords at the bottoms. But this problem does not happen as often as you might think. You can read more about this here.
About the Paracord:
Most paracord will shrink after getting wet. This shrinkage can vary from around 2% to over 12%! If you choose to make your own BirdSavers using Option #1 above, this shrinkage could eventually leave an area at the bottom of the window with ‘exposed’ glass (although small) that a bird could fly into. Because of this, you might want to consider soaking the paracord in a bucket of hot water for a few hours and then let it dry (to ‘pre-shrink’ it) before making your BirdSavers. This procedure also serves to eliminate any “kinks” that may be in the cord as a result of the tight packaging when it was purchased (see the “Straighten Kinks & Pre-shrink Paracord to Make Acopian BirdSavers” video.)
We have been using dark olive green colored parachute cord (550 paracord) to make Acopian BirdSavers for many years. Also commonly called Olive Drab color, the 550 paracord has a diameter of approximately 1/8”. Using this cord for Acopian BirdSavers has proven very effective, as well as aesthetically pleasing. We are fairly certain though, that any dark color, or for that matter probably any color or any type of cord, will be just as effective as the dark olive green color paracord.
Step 3: Cut the vertical paracord pieces to the length you need and melt the ends with a match.
Before you cut any paracord, be sure you have read the "About the Paracord" section above this step. The "About the Paracord" section has a video you should watch that shows you how to pre-shrink the paracord, as well as straighten any kinked paracord.
Step 4: Tie a single knot at one end of each vertical paracord piece.
Tie a single knot at the very end of each piece of paracord. Contrary to common belief, there doesn’t need to be a “tail” to make the knot secure. The knot can very secure without the ugly looking tail; watch the How to Tie a Paracord End Knot Without a Tail video.
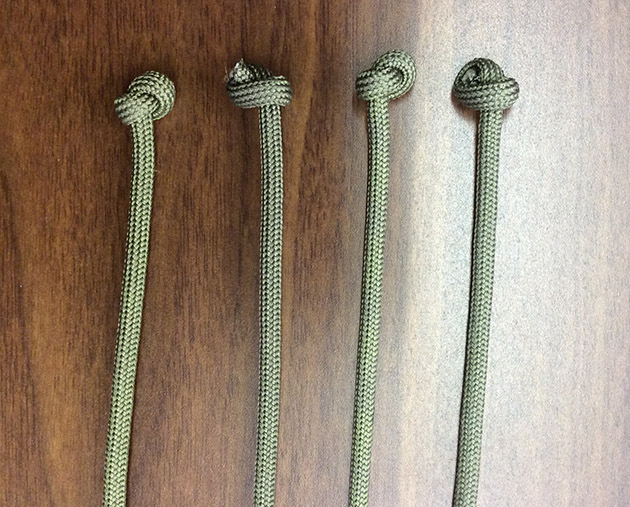
These paracord pieces will be threaded through the horizontal paracord piece (see BirdSavers Tying Technique video).
Step 5: Thread (attach) the vertical paracord pieces to the top horizontal paracord piece.
See BirdSavers Tying Technique video for how to "thread" (attach) the vertical paracord pieces to the top horizontal paracord piece. (Or you can simply tie the vertical paracord pieces to the top horizontal paracord piece, at the distance you determined in Step 1; but the vertical paracord pieces may shift their position if they are simply tied onto the top horizontal paracord piece.) The tying technique shown in the video prevents the vertical paracord pieces from sliding along the horizontal paracord.
Leave enough excess paracord on each end of the horizontal paracord piece so that it can be hung using the method you prefer; about 5” excess cord beyond each end vertical paracord piece is probably enough depending on the method you use and where/how you will attach the BirdSavers to the building.
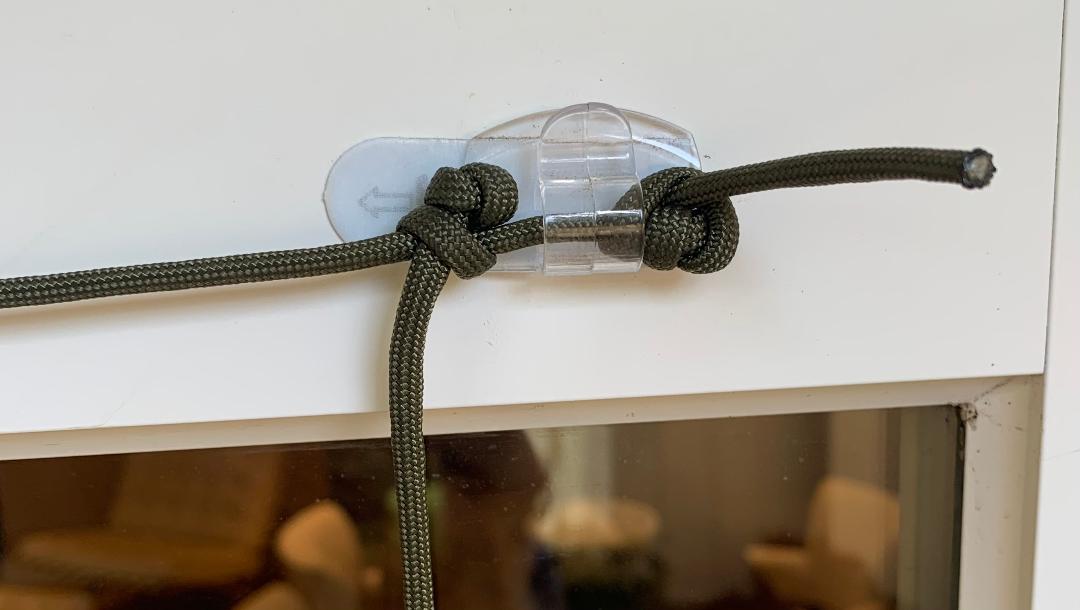
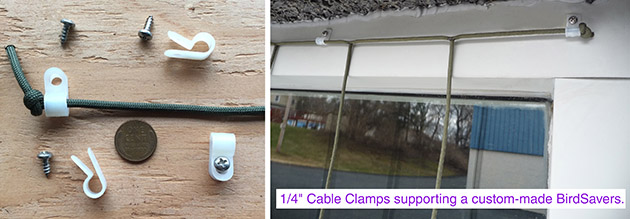
There are many methods that can be used to attach your All Paracord BirdSavers to the building. 3M Command™ Outdoor Light Clips (Model #17017CLR-AWES), as shown in the photos below, work very well.

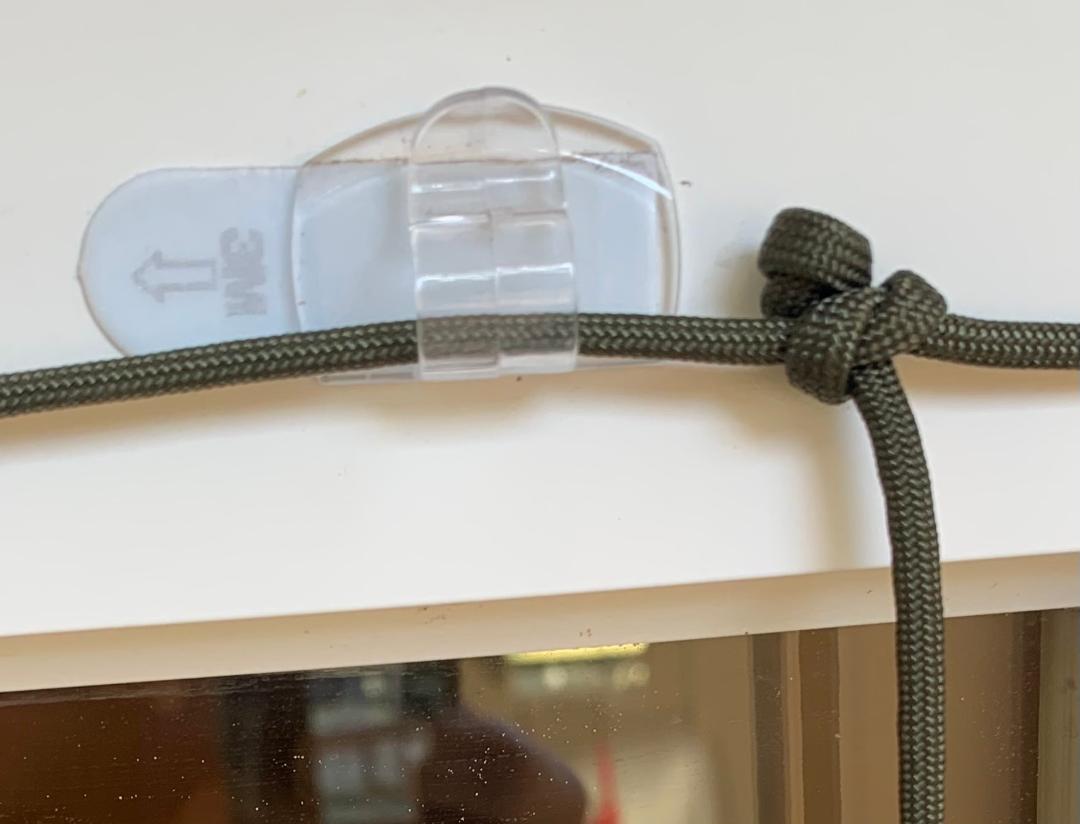
Cable Clamps (1/4”) and #6 x 3/8” stainless steel sheet metal screws like the ones shown in the photos below also work very well.
Step 6: If you’ve finished making your BirdSavers, then it is ready to be installed on the window!

You will, obviously, need to attach each end of the horizontal paracord to the building. Besides those two end attachments, if the horizontal cord is sagging too much you can also add attachments in the middle of the horizontal cord (Screws and Clamps or the Command Clips work well for this, but there are numerous other methods that can be used.) We have found that support attachments placed about every 3 or 4 vertical cords to keep the horizontal cord from sagging works well. For example, if your BirdSavers has 12 vertical cords, there should be two end attachments and also two or three support attachments spaced out relatively evenly between the 12 vertical cords. But you can use less or more support attachments as you desire.
Step 7: Position the BirdSavers against window.
Hold the BirdSavers against the window in the position that it should be in when it is in it’s final position – Position the BirdSavers so that the two "hanging cords" on each end are the same distance from each side of the window as in the drawing above. Attach the BirdSavers to the building.
Step 8: Finishing Touches
After the BirdSavers is installed, any kinks or curves in the "hanging cords" can be smoothed out by holding the offending cord near the top with your fingers and then pulling (straightening) the bottom of the cord with your other hand.
This All Paracord method of making BirdSavers works for any size BirdSavers, such as the tiny 3 vertical cord BirdSavers in the BirdSavers Tying Technique video, but it also works for BirdSavers as large as even 50 vertical cords and 20 feet or more in height!
Step 9: Where are your BirdSavers?
When you are finished, please let us know where your DIY BirdSavers are located and we will add them to the Where are BirdSavers list and interactive map. And even send us some photos. We would love to see your BirdSavers! Thanks. dizzybird@birdsavers.com
Final Installation of Completed BirdSavers:

